


How To Set Up Your Training Board
So you've just bought your Snowboard Addiction Training Board, either the Tramp Board or Jib Board, and you wanna get shredding. But how do you put the seatbelt things on it? Let us show you how to set up your training board so you can improve your riding sooner.
(Narrating/Rider: Duncan Mainland. Filming/Edit: Vince Emond)
First Things First
Grab your bindings and undo the ankle strap by removing the velcro cover and lifting up the tab on the ratchet, pulling the ladder completely out. Loosen the toe strap by pulling off both velcro tabs and pulling up on the padded area. Finally, remove the heel cup padding and lift out the rubber base plate covering by pulling on the heel cup.
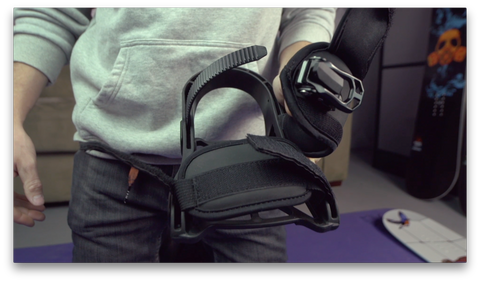 Everything should slide out smooth. If there is a lot of resistance, you might be pulling the wrong part.
 Everything should slide out smooth. If there is a lot of resistance, you might be pulling the wrong part.
Dial In That Stance
Before you attach your bindings, you'll wanna make sure you have a stance that works for you. Stand with your training board in front of you, or stand right on top of it. Perform a series of deep, deep squats until you feel that burn while making small adjustments with your feet each time until you find a position that feels good.
 Great form.
 Great form.
Take note of the angle fo your feet and how far apart they are, even go grab a tape measure and measure out the width from the middle of each foot. This will be the stance on your Training Board.
Tech Tip: You're stance will evolve as you progress as a rider, so don't be afraid to make small adjustments as you go.
Setting Them UP!
Your training board is a twin shape design, so either end works as the nose or tail. Set up your bindings centered with an equal amount of board on each end. When you do this, please make sure the buckles are facing the outside, this not only makes it easier to strap in but also means you don't look like a total Jerry. Use that tape measure again to help figure out where you'd like your bindings to sit.
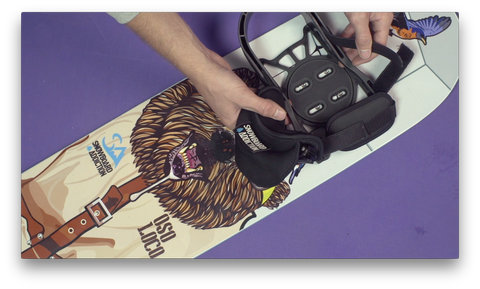 Make sure the ratchet buckle is on the outside of your foot.
 Make sure the ratchet buckle is on the outside of your foot.
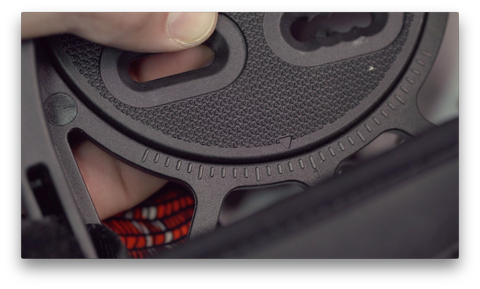
If the holes don't line up exactly with the width that you'd like, you can use the sliders on the disk to fine tune it. Once you're happy with the width, you can start putting your screws in, but just a few turns. You want your screws loose enough that you can still twist the disk to get the correct angle you're looking for.
Tech Tip: Each notch in the base plate turns the bindings 3 degrees.
 Don't fasten the screws until you are happy with your stance.
 Don't fasten the screws until you are happy with your stance.
Finish It Off
Once you've got your stance with the width and angles you'd like, you can snug down the screws, reinsert the rubber base plate cover and put that heel padding back in.
Test It Out
Now that it's locked in, give it a go! Place your heel into the heel cup of the bindings and slide the ladder into the ratchet over top of your foot and tighten until your foot is snug, but not so tight that it turns blue. If the ankle strap doesn't fit perfectly, do a small adjustment on the other side of the strap by making it shorter or longer as you need. Make sure to re-fasten the velcro cover to give it that sleek, Batman look. Pull the velcro tabs on the toe strap, until it is snug around the toes, first the inside and then the outside.
 Jump on it, press it around and have a play.
 Jump on it, press it around and have a play.
Now that your training board is all set up and you're strapped in, start sending it! Play around a little bit, get comfortable, start shredding and improve your riding today.
Want training tips and free lessons, straight to your inbox?
Alex McCann
Snowboard Addiction
Our Goal Is To Improve Your Riding


