
Basic Buttering Position
This is Step One of a Six Step progression on the Basics Of Buttering. We have included the first step for free, to help you start buttering up the hill with ease and style!
To see the additional steps on buttering, check out our Snowboard Tutorial Membership.
(Narrating/Riding: Nev Lapwood. Film/Editing: Adison MacDonald. Filmed At: Whistler Blackcomb)
Tip 1) Where To Shift Your Weight
When riding normally, your body position will look something like this:
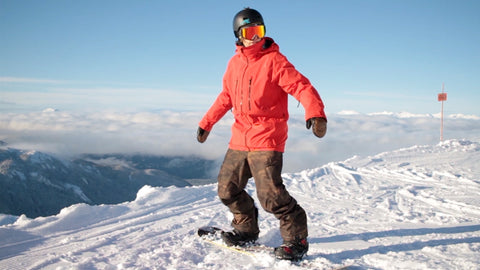 Nev with a classic buttering position.
- Ankles Bent
- Knees Bent
- Back Up Straight
- Head Up Straight, Looking In The Direction You're Riding
- Upper And Lower Body Aligned With Your Snowboard
When you want to start buttering, all you have to do is shift your weight towards the tail or the nose, whilst keeping your normal riding position exactly the same.
When cruising down the hill, your weight should be centred over the middle of your board. To start buttering, all you need to do is shift the weight of you body towards the tail or the nose.
Weight In The Middle Of The Board
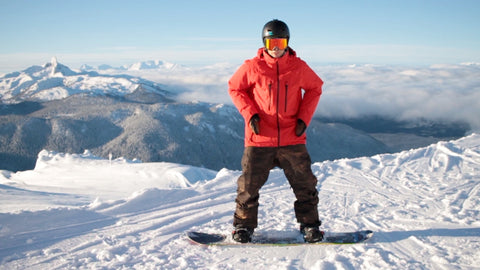 That's it, right down the middle.
Body Weight Shifted Towards The Tail
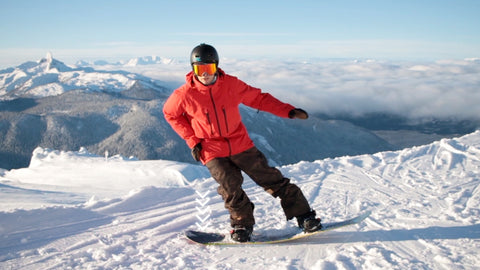 Notice how Nev has shifted his weight out over the tail of his board.
If you hover your weight just over your back-foot, your board is not going to do much, and still be pretty flat with the snow. To get that stylish press, imagine a dot on your snowboard and shift your weight right onto that point.
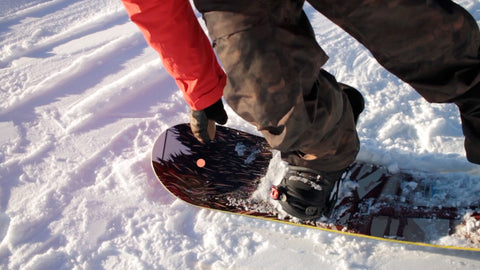 This is where your weight should be pressed over.
When you shift your weight, you will notice that your board will rise up off the snow. You don't physically need to lift your snowboard off the ground with your front leg. The tip of the snowboard should rise by just shifting your weight appropriately.
Once you have mastered this position on your tail, try it on your nose. Use the exact same technique of shifting your weight to the nose. Remember to keep your normal body position.
Pick A Point On The Nose Of Your Snowboard
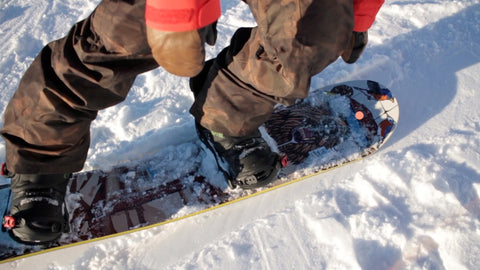 Now press it out over your nose.
Project Your Weight Into That Spot
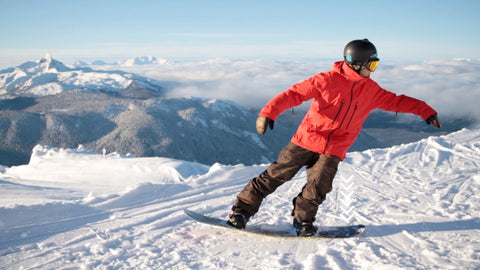 Nev now showing the upper body position.
Tip 2) Control Your Press
When shifting your weight, your snowboard is only going to rise off the ground by 10cm/4 Inches.
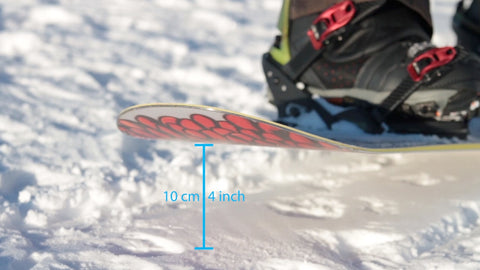 The ideal press height.
When pressing, a small controlled press looks way more stylish than a huge, out of control press. You will just look like a jerry if you try to fling your snowboard off the ground.
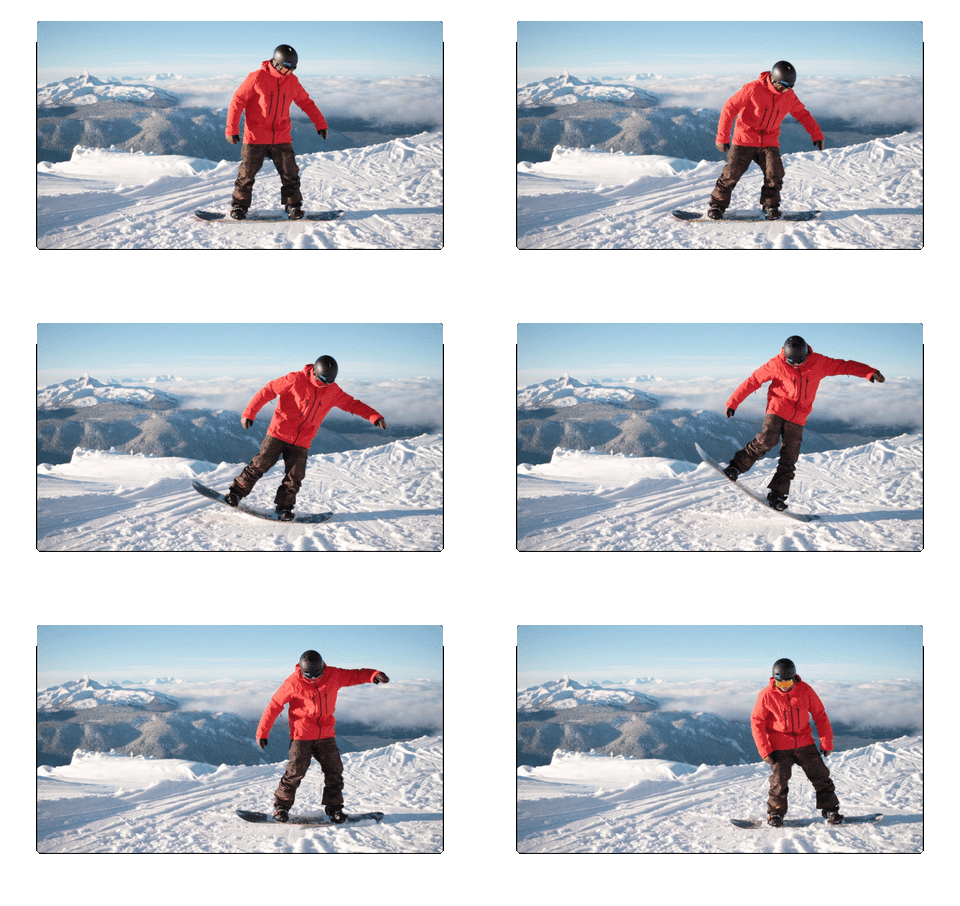
A small controlled press allows you to have more balance and butter for longer.
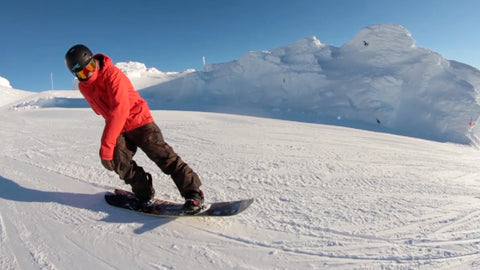 See how long you can butter for.
Tip 3) Keep Your Back Knee Over The Top Of Your Back Foot
A common mistake with new riders trying these butters, is the tweaking of their back leg inwards.
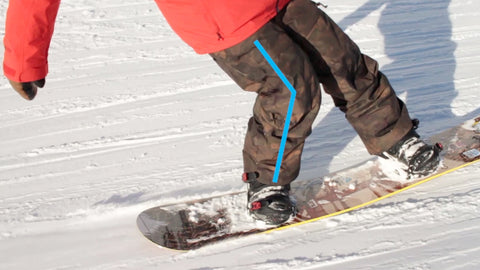
This tweaking of the back leg inwards is not a strong stable position. The best position to be in is to have your knee over the top of your back leg.
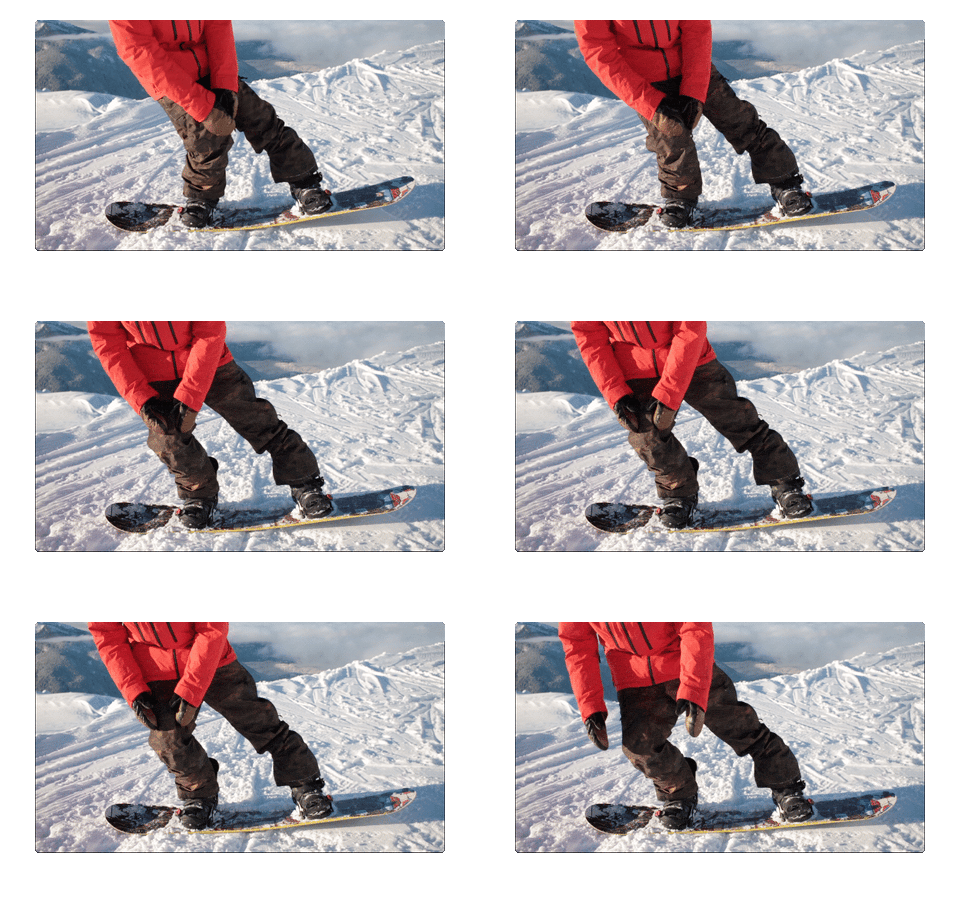
Knee Position Should Look Like This (Knee Is Over The Foot):
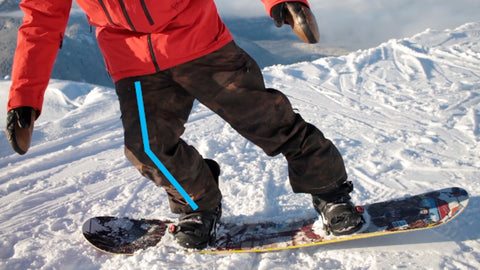
Tip 4) Don't Just Lean
A lot of riders when first trying presses, just lean over the top of their board.
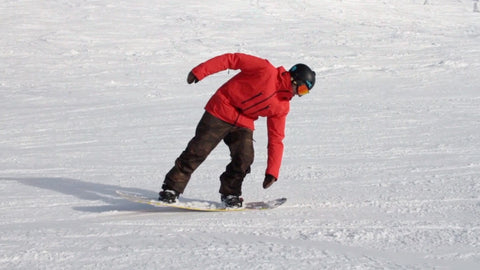 Notice how Nev is just bending at the hips. Don't do that.
Really focus on shifting your hips and weight over that imaginary dot that we focused on in Tip 1. Shifting your weight is going to make that press happen, not how much you lean.
Focus On Shifting Your Hips
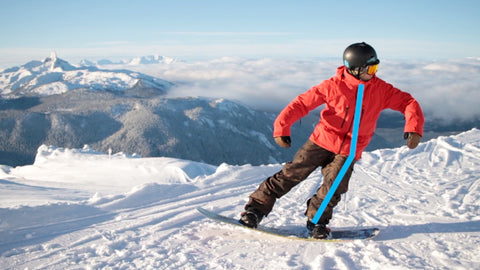 Notice how Nev is projecting his knees, hips and upper body out over the board. Do that.
Now that you've got the Basic Buttering Position dialled in, it's time to learn How To Ride In The Buttering Position.
Want more awesome trick tips? Then join our newsletter:
Jake Adams
Snowboard Addiction
Our Goal Is To Improve Your Riding

 Nev with a classic buttering position.
 That's it, right down the middle.
 Notice how Nev has shifted his weight out over the tail of his board.
 This is where your weight should be pressed over.
 Now press it out over your nose.
 Nev now showing the upper body position.
 The ideal press height.
 See how long you can butter for.
 Notice how Nev is just bending at the hips. Don't do that.
 Notice how Nev is projecting his knees, hips and upper body out over the board. Do that.