How To Nose Press Back 1
Spinning out of a feature is challenging at first, but once you have it on lock, it really steps up your jib game and adds a ton of style to your riding! The Nose Press Back 1 is very similar to the Nose Press Front 1, but if you haven't tried either, we'd recommend learning the Front 1 first as most riders find this easier. Before attempting the Nose Press Back 1, it's important to have both Nose Presses and 50-50 Back 1's dialled. These tricks create the framework for a Nose Press Back 1 and will help you learn this trick much faster!
(Narating/Riding: Nev Lapwood, Mike Barton, Filmer: Vince Emond, Filmed at: Whistler Blackcomb)
The 50-50 Back 1
A great way to start learning this trick is by locking down 50-50 Back 1's first. The 50-50 Back 1 will give you the same feeling on the counter rotated backside 180 out that the Nose Press Back 1 does. If you can stomp these smoothly every then it's time to step it up to the Nose Press.
Practice with Butters!
You can simulate this trick on snow by doing a Nose Butter Back 1. This will help you learn the movements of the trick without taking the risk. Nose Butter Back 1's and Nose Press Back 1's use the exact same physical movements, but doing this on boxes and rails requires precise timing.

Stomp this trick on a knuckle to get the same feeling without the risk!
Start Small!
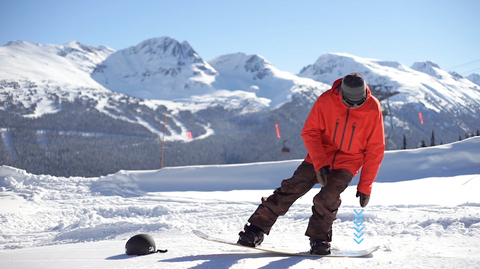
When learning a new trick it is always best to start on a smaller feature that you're more comfortable with. Starting on a small flat box will help you get the weight distribution for the Nose Press just right. Many riders have difficulty getting into the pressed position because they don't realize how far forward they have to lean to fully commit to the press. On down features, you must lean even further forward to maintain the pressed position. It's also important to note that if you go too slow on the box, the trick will become harder to pull off. Momentum is your friend.

Notice how Nev keeps his weight positioned over his front foot to lock in the press.
The Back 1 Out
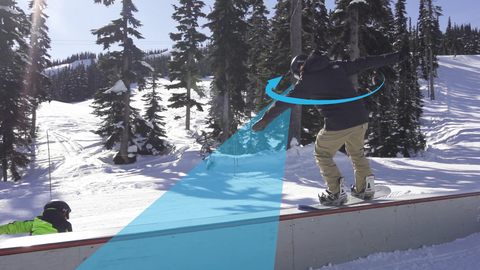
The Back 1 Out uses counter rotation, so your positioning at the end of the feature is crucial. Once you enter the Nose Press, rotate your arms and shoulders towards the tail of the board while still trying to keep your eyes locked on to the end of the feature. This body position will make it easy to pop a counter rotated 180 off the end of the feature.

Keeping your eyes on the prize will make sure your board stays aligned with the feature.
The Blind Landing
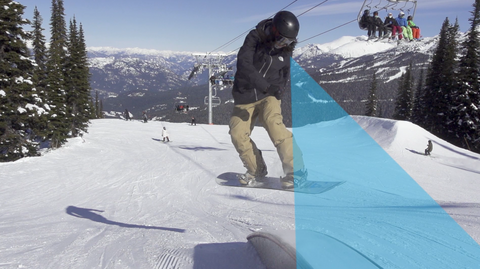
Anytime you're doing a Backside 180 on the mountain, it's important to stomp the landing blind. The same thing goes for a Backside 180 off the end of a feature. This means that you want to look either at the end of the feature, or back up the mountain while you land. Trying to look over your shoulder and spot your landing will cause you to throw off your balance and can often lead to catching an edge. Landing switch and riding away with control will help you get set up for the next feature. Once you hit a certain riding level you will learn to subconsciously know where the end of the feature is and you won't have to look for it.

"Blind" means that your head doesn't continue the rotation with you and your line of sight is at the end of the feature of back uphill.
Practice Makes Perfect
One of the best ways to get this feeling is to practice this trick all year round on a Jib Board and Balance Bar. Not only does this create a realistic feeling of stomping the trick on snow, but it also conditions your legs to the movements.
Now that you know what it takes to throw down a Nose Press Back 1, it's time to get out there and practice! Remember to start small and work your way up. Before you know it you'll be sending this trick off every feature in the park!
Ready to take your dialled riding to the park?
Mason Copeland
Snowboard Addiction
Our Goal Is To Improve Your Riding


