


How To Ride Switch
When you first learn to snowboard, you generally only ride in one direction. As you build confidence and you start entering into the terrain park, you realize: "Oh, I need to learn how to ride switch!" This blog and tutorial is going to fast track your switch riding.
(Narrating/Riding: Nev Lapwood)
Starting Out
The first thing you have to do is get out there and force yourself to ride switch. You need to ride switch as much as you possibly can. Whenever you are on a cat track or a boring run, ride it switch. A good thing to do is take at least one full run out of every single day and ride that run completely switch.
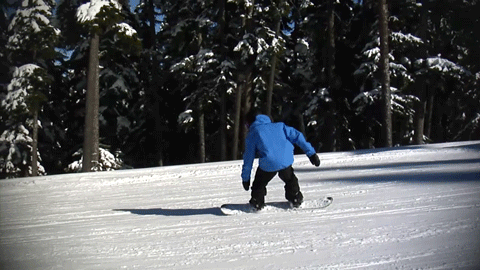
A good challenge is trying to ride the chairlift switch, with your opposite foot strapped in. This is going to force you to do movements you're not comfortable with. It's also very good for your muscles to ride switch, it will allow your muscles to develop evenly through both sides of your body. Getting good at riding switch will make you a far better rider and will greatly increase your confidence and board control.
"Boob" Turns
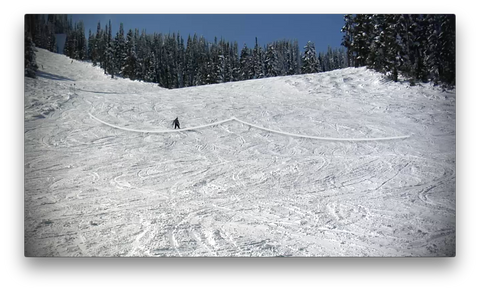
An entry level technique you can do to help you learn riding switch is boob turns. Find a wide, quiet run where you will be able to use the entire width of the run without taking anybody out. Set off down hill, take a little bit of speed and begin a toe side turn. Turn all the way around and begin to travel up hill. As your board comes to a stop, roll to your heel edge, continue down hill in a switch heel side turn.
You end up doing a big and curved "UU" shape across the run. It's basically a regular turn, followed by a switch turn.
On the other side of the run, start off on your heel edge. Go down hill to get a bit of speed and do a big heel edge "U" so that you come up hill on the run. As you come to a stop, roll onto your toe edge and continue down hill on a switch toe side turn.
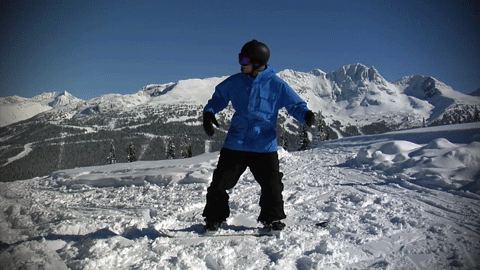
Don't mind me, just carving away.

The reason this exercise is call boob turns is because once you can do it good, your path in the snow should resemble a big pair of smooth, round "boobs". Repeat this until you feel that your boobs are a good shape. This is a great exercise for first time switch riders because it lets you learn to switch edges at low speeds, with low consequences.
Leaning Downhill
When riding in your normal stance, your body is leaning downhill with the same angle as the slope. By default, your body is used to leaning forwards with your weight on the front foot. When you turn around and try to ride switch for the first time, you're so familiar with being down hill towards your front foot, that your weight tends to stay over that foot (which is now your back foot) resulting in you leaning too far back. This is the most common problem with riders learning how to ride switch. You need to have the majority of your weight downhill, towards your new front foot. Train your brain to get used to a different weight transfer depending on whether you're riding normal or switch.
If you don't improve your weight dispersal, you're going to find it very difficult to make your switch turns smooth.

Weight Dispersement Drill:
To get your weight far enough forward when riding switch, go to a mellow run and set off riding switch. As your about to make each turn, see if you can lift your back foot off the snow a little bit. Do two or three taps and then make a toe edge turn. Do two or three taps, and do a heel edge turn. It should be very easy to lift your tail and tap. This is how you'll know whether your weight is far enough forward or not.
Tap Tap Taparoo

Spin 360's
When people start learning how to ride switch, people tend to forget about basic stuff they already know, such as getting on your edge early for each turn. If you feel your switch turns are catchy on your edges, you're probably riding with a base that's too flat. Instead get on your edge very early for each turn, like you do when you are riding normally. A very good activity to develop smooth and early edging for switch riding is to spin 360s on the snow.
Find a relatively flat run for this and watch out for other people. Head off down hill and try to spin a 360 four times on the snow. Whether you realize it or not, you're using a regular turn followed by a switch turn. You're improving your switch turns and edging by sliding these 360s. It also helps to give you a very even position over both feet and gets you used to being on the correct edge. Do the exact same thing but in the opposite direction. This is going to develop the other switch turn. Do this until you feel comfortable in both directions.
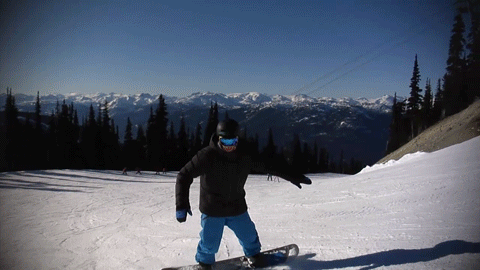
Counter Rotation
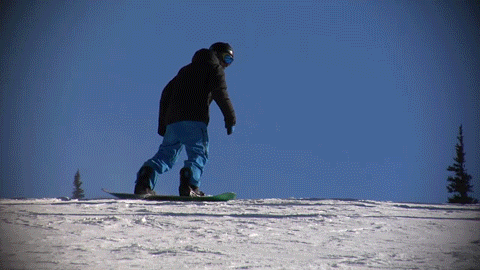
Another major problem with learning how to ride switch is counter rotating on your toe side turns. Counter rotation is when the rider swings their toe side turn around, by forcing their upper body in the opposite direction. This is very unstable and looks terrible. If your switch toe side turns feel jolty or unstable, you are probably counter rotating.

Notice this riders "counter rotating". His body is NOT aligned.

The ideal way to make each turn is with your upper and lower body in alignment, working together to make the turn happen. Your head should turn first, followed by your shoulders, hips, knees and finally the board. When your body is aligned for each turn, your stability is maximized. You will benefit from more stability and better style.
Want even more training tips and free lessons straight to your inbox?
Jesse-Ray Townsend
Snowboard Addiciton
Our Goal Is To Improve Your Riding


