


Your First Backside 180s On A Snowboard
So you've been killing it on those straight air park jumps - now it's time to start spinning on them. Let us help you learn your First Backside 180's (also termed "Back 1"). It's a super stylish trick that every snowboarder should have dialled. Check it out below now, or join our Snowboard Tutorial Membership to get all our tutorials!
We have three other great Backside 180 tutorials, check them out:
(Narrating/Riding: Nev Lapwood. Film/Edit: Adison MacDonald. Filmed At: Whistler Blackcomb)
Learning your first Back 1s are slightly harder than your first Front 1s because your riding direction goes out of view during the spin. Don't let that phase you though, follow these progression steps below and you'll be right.
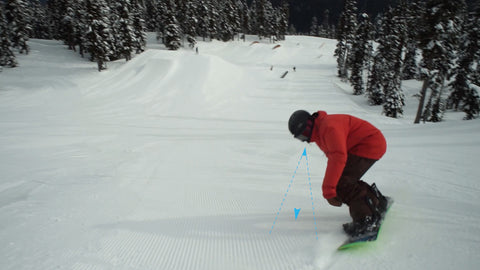
Step 1) Sliding
While riding a gentle slope, try sliding a Back 1 on the ground. Engage your toe edge with the snow to turn and continue turning all the way around until you're riding switch.
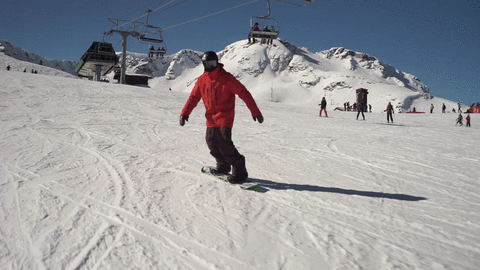 Nice and smooth.
 Nice and smooth.
Don't look downhill though! Try to keep looking uphill throughout the entire 180 trusting your edge in the snow. When you're comfortably riding downhill switch, you can now turn your head to see where you're going.
Trick Tip: It's a called Backside 180 because it's the back of your body that faces downhill throughout the first 180 degrees of the spin.
Now start to add some rotational movements with your upper body. Wind up and swing your shoulders and arms into your turns. Also try unweighting your board as you spin, to replicate popping while in the air.
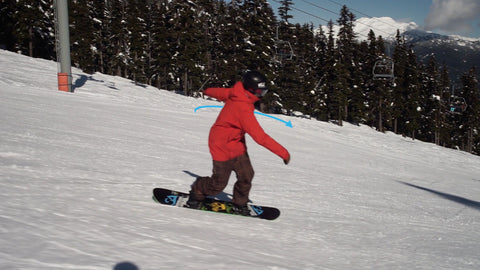 The combination of these techniques will allow you to rotate a 180 faster.
 The combination of these techniques will allow you to rotate a 180 faster.
Step 2) Traversing
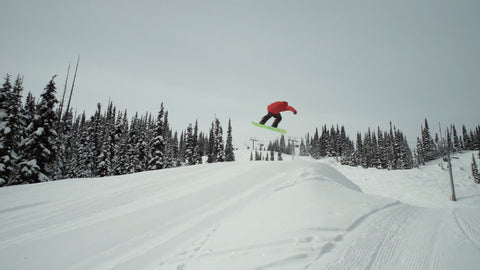
Now that you've got the movements figured out, let's 180! Traverse a slope on your toe edge, wind up with your arms and shoulders to create momentum, then jump and spin uphill to complete a Backside 180.
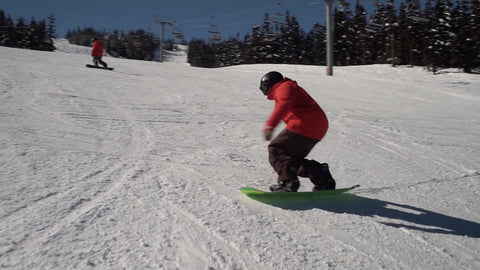 You should be comfortable carving on your snowboard at this point.
 You should be comfortable carving on your snowboard at this point.
Look for a small bump in the snow that you can time your release with. This will help to get higher off the ground and make the trick easier.
 Moving your arms as little as possible is better for style.
 Moving your arms as little as possible is better for style.
Step 3) The Blind Landing
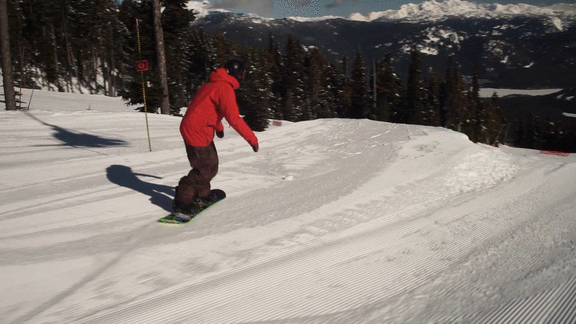
As you land these first Back 1s, your head should be looking somewhere around the back of your board. If you immediately look into your new direction as you land, it's likely that you'll wash out. Instead, use a blind landing.
 It's important you get the blind landing engrained into your muscle memory as it is used for half of all spin tricks.
 It's important you get the blind landing engrained into your muscle memory as it is used for half of all spin tricks.
Step 4) Side Hits
Now it's time to explore the mountain and find those perfect Back 1 side hits. These are the perfect place to practice Backside 180s, because they'll force you to approach on your toe edge.
 Remember to add more pop each time to add style to your Back 1s. Adding more height also means your Back 1s will come around easier because you are spinning slower.
 Remember to add more pop each time to add style to your Back 1s. Adding more height also means your Back 1s will come around easier because you are spinning slower.
Remember, start off by sliding your Back 1s on snow as this will allow you to engrain the Back 1 movements into your muscle memory. Then, practice your Back 1s while traversing, always focusing on that blind landing. Once that's dialled, you can explore those side hits and start sending your Back 1s!
Want Even More Training Tips?
Alex McCann
Snowboard Addiction
Our Goal Is To Improve Your Riding


